Assembling a futon bunk bed requires careful planning and attention to detail․ This guide provides step-by-step instructions to ensure safety, stability, and proper functionality․
1․1 Overview of Futon Bunk Beds
Futon bunk beds are versatile, space-saving furniture pieces combining a bunk bed with a futon․ They offer a practical solution for small rooms, providing both sleeping and seating options․ Typically, these beds feature a upper bunk for sleeping and a lower futon that converts into a sofa or additional bed․ Designed for comfort and functionality, futon bunk beds are ideal for children, guests, or shared living spaces, ensuring efficient use of space while maintaining style and convenience․
1․2 Importance of Proper Assembly
Proper assembly of a futon bunk bed is crucial for safety, stability, and functionality․ Incorrect assembly can lead to structural weaknesses, posing risks of collapse or injury․ Ensuring all parts are securely fastened and aligned guarantees the bed’s durability and prevents potential hazards․ Following the instructions carefully also ensures the futon operates smoothly, converting between sofa and bed modes without issues․ Proper assembly is key to enjoying a safe, reliable, and long-lasting futon bunk bed․
Parts Identification and Inventory
Identifying and inventorying all parts is essential before assembly․ Check off each component, hardware, and tool as you unpack to ensure nothing is missing or damaged․
2․1 Checklist of Components
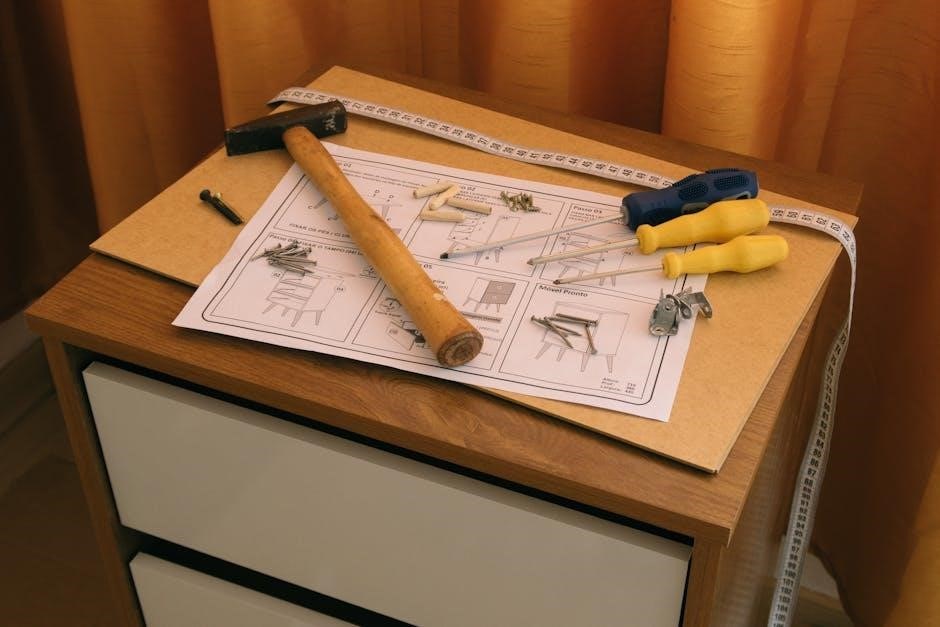
A comprehensive checklist ensures all parts are accounted for before assembly begins․ Typical components include the futon frame, bunk bed structure, ladder, guardrails, mattress support slats, and hardware such as bolts, screws, and Allen wrenches․ Tools like screwdrivers and wrenches are also essential․ Verify each item against the inventory list provided in the manual to avoid delays during assembly․ Missing or damaged parts should be addressed immediately to ensure a smooth process․
2․2 Understanding Hardware and Tools Needed
Identify and organize all hardware and tools before starting․ Essential hardware includes bolts, screws, and Allen wrenches, while tools like screwdrivers and wrenches are necessary․ Refer to the inventory list to ensure all components are present․ Verify the types and quantities of each item to avoid assembly delays․ Proper tools and hardware ensure a secure and stable structure, so double-check everything before proceeding․
Safety Precautions and WARNINGS
Always follow safety guidelines to prevent injuries․ Ensure weight limits are not exceeded and proper assembly is achieved․ Use guardrails for added safety on upper bunks․
3․1 General Safety Guidelines
Always read and follow the assembly instructions carefully․ Ensure all screws and bolts are tightened securely to maintain structural integrity․ Avoid standing on the bed during assembly․ Keep children away from the assembly area to prevent accidents․ Use protective gear like gloves and safety glasses if needed․ Ensure the bed is placed on a firm, level surface for stability․ Never skip safety steps to ensure the bed is safe for use․
3․2 Weight Limits and Structural Integrity
Adhere to the manufacturer’s weight limits to ensure safety․ Typically, futon bunk beds support between 200-400 pounds per bunk․ Check the weight capacity on the product label or manual․ Ensure all joints and connections are secure to maintain structural integrity․ Avoid overloading the bed, as this can lead to instability or collapse․ Regular inspections are crucial to uphold safety standards and prevent potential hazards․
Step-by-Step Assembly Process
Follow a structured approach for assembling the futon bunk bed․ Begin with the frame, then move to the futon section, and finally construct the bunk structure․ Ensure all steps are completed in sequence for a smooth assembly process․ Use the provided tools and hardware correctly, referring to the manual for guidance․ Always prioritize safety and stability throughout the process․
4․1 Preparing the Frame
Begin by carefully unpacking and organizing all frame components․ Identify the stretchers, side rails, and support brackets․ Lay the frame parts on a flat, stable surface․ Attach the stretchers to the side rails using the provided cam locks and bolts․ Tighten all connections firmly to ensure stability․ Double-check the alignment of holes and bolts for proper fitment․ Once the frame is fully assembled, ensure it stands level and sturdy before proceeding to the next step․ Always refer to the manual for specific part identification and assembly sequence․
4․2 Assembling the Futon Section
Attach the futon frame to the lower bunk section by sliding the pre-assembled frame into place․ Secure it using cam locks and bolts, ensuring a snug fit․ Tighten all bolts firmly to prevent movement․ Align the futon mattress support brackets with the frame and attach them using the provided screws․ Double-check the alignment and stability of the futon section before placing the mattress․ Ensure all connections are tight for safe use․
4․3 Building the Bunk Bed Structure
Attach the side rails and support slats to the upper bunk frame․ Secure the ladder to the side using wood joint connectors․ Align the upper bunk frame with the lower section and connect using bolts and cam locks․ Tighten all connections firmly․ Ensure the structure is level and stable․ Double-check the weight capacity and ensure all safety features are properly installed before finalizing the assembly․

Attaching the Ladder
Identify the ladder components and align them with the pre-drilled holes on the bunk bed frame․ Secure the ladder using wood joint connectors and bolts for stability․
5․1 Securing the Ladder to the Bunk Bed
Locate the ladder brackets on the bunk bed frame and align the ladder accordingly․ Use wood joint connectors and bolts to attach the ladder securely․ Tighten all screws firmly to ensure stability․ Double-check the alignment to prevent wobbling․ Ensure the ladder is evenly spaced and tightly fastened to the bed structure for safe access to the upper bunk․ Follow the manufacturer’s instructions for proper torque specifications․
5․2 Ensuring Ladder Stability
After securing the ladder, test its stability by gently applying weight․ Ensure all bolts and connectors are tightly fastened․ Double-check the alignment to prevent tilting or wobbling․ Place the ladder firmly on the floor and verify it is centered on the bunk bed․ Regularly inspect the ladder’s connections to maintain stability and safety over time․ Ensure the ladder is evenly spaced for optimal support and durability․

Installing Guardrails
Guardrails are essential for safety, especially on the upper bunk․ Attach them securely to prevent falls and ensure a stable sleeping environment for users․
6․1 Attaching Guardrails to the Upper Bunk
Align the guardrails with the pre-drilled holes on the upper bunk frame․ Secure them using the provided bolts or screws, ensuring a snug fit․ Tighten firmly without overtightening․ Check stability post-attachment for a safe and sturdy setup․
6․2 Adjusting Guardrail Positions
After attaching, ensure guardrails are snug and evenly spaced․ Adjust their position by loosening the mounting hardware slightly, then retightening once aligned․ Verify that guardrails are level and properly secured to prevent shifting․ Double-check that all screws are tightened firmly for maximum safety and stability, ensuring the upper bunk remains secure for use․

Adding the Futon Mattress

Place the futon mattress on the assembled frame, ensuring proper alignment and fit․ Secure it firmly using the provided straps or brackets to prevent shifting during use․
7․1 Placing the Mattress on the Futon Frame
Position the futon mattress carefully onto the frame, ensuring it aligns with the edges․ Gently lower it to fit snugly within the structure․ Check for even distribution and make sure no part overhangs․ This ensures safety and prevents potential damage to the frame or mattress․ Proper placement is crucial for comfort and stability․
7․2 Securing the Mattress for Safety
Tighten all bolts and screws around the mattress area to ensure a firm hold․ Use any provided straps or clips to fasten the mattress to the frame, preventing movement․ Double-check the weight limit to avoid overloading․ Ensure the mattress is evenly spread and secure to prevent shifting during use, enhancing safety and comfort for the user․

Final Adjustments and Tightening
After assembly, inspect all connections and tighten any loose screws or bolts․ Ensure the bed is level and stable, checking for wobbling or unevenness before use․
8․1 Checking All Connections
8․2 Ensuring Stability and Levelness
After assembly, place the bunk bed on a firm, even surface․ Use a spirit level to verify the frame is perfectly horizontal․ If uneven, adjust the legs or add shims under the feet to stabilize․ Ensuring the bed is level prevents wobbling and enhances safety, especially for the upper bunk․ Double-check all connections to confirm they are tight and secure for optimal stability and user safety․ This step is crucial for long-term reliability․

Troubleshooting Common Issues
Identify and address assembly problems promptly․ Common issues include loose connections, wobbling, or hardware misalignment․ Tighten screws, realign parts, and verify weight limits for stability․ Ensure all bolts are secure and double-check instructions for proper assembly․ Addressing these issues early prevents structural weaknesses and enhances safety․ Regular inspections can help maintain the bed’s integrity and performance over time․ Always refer to the manual for specific solutions․ If issues persist, contact the manufacturer for assistance․ Proper troubleshooting ensures long-term durability and reliability of the bunk bed․ Additionally, keep all tools and spare hardware handy for quick adjustments․ By resolving problems early, you can enjoy a sturdy and comfortable sleeping solution for years to come․ Remember, safety should always be the top priority when dealing with bunk bed assembly issues․ Don’t hesitate to seek professional help if you’re unsure about any step․ This section provides practical advice to help you overcome common challenges during and after assembly․ With careful attention to detail, most issues can be resolved efficiently․ Always follow the manufacturer’s guidelines and safety precautions to avoid further complications․ Troubleshooting is an essential part of ensuring your futon bunk bed remains safe and functional․ Stay proactive and monitor the bed’s condition regularly․ Your diligence will pay off in the form of a reliable and comfortable sleeping environment․ Never overlook the importance of proper assembly and maintenance․ It’s the key to enjoying your futon bunk bed for years without issues․ If you encounter any unusual problems, document them and reach out to the manufacturer for support․ They can provide specialized guidance or replacement parts if needed․ In the meantime, avoid using the bed until the issue is resolved․ Your safety and satisfaction are paramount․ By taking these steps, you can troubleshoot effectively and maintain your bunk bed’s quality․ Always stay informed and prepared to handle any assembly-related challenges․ This will ensure your futon bunk bed remains a safe and sturdy addition to your home․ Remember, prevention is better than repair․ Regular checks and timely interventions can prevent major issues from arising․ Familiarize yourself with the troubleshooting tips provided in this guide to handle any situation confidently․ With patience and attention to detail, you can overcome any assembly-related obstacles․ Keep this section handy for quick reference whenever you need to address a problem․ Your diligence will ensure the bed remains stable, secure, and comfortable for everyone who uses it․ Always prioritize safety and follow the recommended guidelines for troubleshooting․ By doing so, you’ll extend the lifespan of your futon bunk bed and enjoy uninterrupted comfort․ If you’re still unsure, don’t hesitate to consult additional resources or seek expert advice․ Taking the extra time to resolve issues correctly will be well worth the effort in the long run․ This guide is designed to empower you with the knowledge you need to handle common assembly challenges effectively․ Use it as a trusted resource to maintain your bunk bed’s quality and safety․ Troubleshooting is an essential skill for any DIY project, and with this guide, you’ll be well-equipped to manage any situation that arises․ Stay proactive, stay informed, and ensure your futon bunk bed remains a reliable and comfortable space for years to come․ By addressing issues promptly and correctly, you’ll protect your investment and enjoy a peaceful sleeping environment․ Always remember, proper assembly and maintenance are the foundations of a safe and durable bunk bed․ Don’t let minor issues escalate—take action today to ensure your bed remains in top condition․ Your effort will be rewarded with a sturdy, functional, and comfortable futon bunk bed that meets all your needs․ Keep this guide close to quickly resolve any problems and maintain your bed’s integrity․ With the right approach, you can enjoy your futon bunk bed without any worries․ Always prioritize safety, follow the instructions, and stay vigilant in your maintenance routine․ This will ensure your bunk bed remains a safe and enjoyable space for everyone․ Remember, troubleshooting is a normal part of the assembly process, and being prepared will make all the difference․ Use this guide to navigate any challenges and achieve a successful outcome․ Your patience and dedication will result in a well-assembled, stable, and comfortable futon bunk bed․ Never underestimate the importance of proper troubleshooting—it’s the key to a hassle-free assembly experience․ By staying informed and taking the right steps, you can overcome any obstacle and enjoy the full benefits of your new bunk bed․ Always keep this section handy to quickly address any issues that may arise․ With the knowledge and tools provided, you’ll be confident in your ability to troubleshoot and maintain your futon bunk bed․ Your effort will ensure a safe, comfortable, and long-lasting sleeping solution for years to come․ Stay proactive, stay informed, and enjoy the fruits of your labor with a well-assembled bunk bed․ Troubleshooting is an essential part of owning a futon bunk bed, and with this guide, you’ll be well-prepared to handle any situation․ Keep it as a valuable resource to maintain your bed’s quality and safety․ By addressing issues promptly and correctly, you’ll protect your investment and enjoy a peaceful sleeping environment․ Always remember, proper assembly and maintenance are the foundations of a safe and durable bunk bed․ Don’t let minor issues escalate—take action today to ensure your bed remains in top condition․ Your effort will be rewarded with a sturdy, functional, and comfortable futon bunk bed that meets all your needs․ Keep this guide close to quickly resolve any problems and maintain your bed’s integrity․ With the right approach, you can enjoy your futon bunk bed without any worries․ Always prioritize safety, follow the instructions, and stay vigilant in your maintenance routine․ This will ensure your bunk bed remains a safe and enjoyable space for everyone․ Remember, troubleshooting is a normal part of the assembly process, and being prepared will make all the difference․ Use this guide to navigate any challenges and achieve a successful outcome․ Your patience and dedication will result in a well-assembled, stable, and comfortable futon bunk bed․ Never underestimate the importance of proper troubleshooting—it’s the key to a hassle-free assembly experience․ By staying informed and taking the right steps, you can overcome any obstacle and enjoy the full benefits of your new bunk bed․ Always keep this section handy to quickly address any issues that may arise․ With the knowledge and tools provided, you’ll be confident in your ability to troubleshoot and maintain your futon bunk bed․ Your effort will ensure a safe, comfortable, and long-lasting sleeping solution for years to come․ Stay proactive, stay informed, and enjoy the fruits of your labor with a well-assembled bunk bed
9․1 Addressing Wobbling or Instability
If the bunk bed wobbles, check all connections and tighten loose screws or bolts․ Ensure the frame is level and evenly supported․ Realign any misaligned parts and verify that all hardware is securely fastened․ If instability persists, consider using shims or adjusting the legs for balance․ Regular inspections and adjustments can prevent future issues and ensure long-term stability․ Always prioritize safety by addressing wobbling promptly to avoid accidents․