Bose Amp Wiring Diagram Manual: A Comprehensive Guide
Navigating the Bose system in your Mazda MX-5 (Miata) requires understanding its unique wiring.
This guide details integration with aftermarket head units,
like Kenwood or Sony, while retaining factory features.
The Bose audio system, factory-installed in Mazda MX-5 (Miata) models, particularly the MK3 and MK3.5 generations, presents a unique challenge when upgrading the head unit. Unlike traditional systems, the Bose setup utilizes a dedicated amplifier, located typically near the passenger side, which powers the speakers. This means simply swapping the factory radio won’t yield improved sound; in fact, it can result in a non-functional or severely degraded audio experience. The system is designed to work with the specific impedance and power output of the Bose amplifier and speakers.
Understanding this architecture is crucial before embarking on any head unit replacement. The factory head unit sends a low-level signal to the Bose amp, which then boosts it to drive the speakers. Aftermarket head units generally output a higher voltage signal, potentially overwhelming the Bose amplifier. Therefore, proper integration requires either utilizing a wiring harness adapter that attenuates the signal or employing a different integration strategy altogether. Retaining the Bose amplifier allows preservation of the factory sound signature and avoids the expense of replacing speakers, but demands careful wiring and adaptation.
Understanding the Bose System Components
The Mazda MX-5’s Bose system isn’t a single unit, but a carefully integrated network. Key components include the head unit, the Bose amplifier, and the speakers themselves – typically located in the doors and headrest areas; The amplifier, a central element, receives signals from the head unit and boosts them to power the speakers; It’s crucial to identify the amplifier’s location, usually on the passenger side, for wiring access during upgrades.
Speakers are specifically tuned for the Bose system, possessing unique impedance characteristics; Replacing them without addressing the amplifier can lead to sound quality issues. The wiring harness connecting these components is also vital; it carries both power and audio signals. Adapters, like those from Connects2, are designed to interface with this harness, allowing connection to aftermarket head units. Recognizing the role of each component – from the head unit’s signal output to the amplifier’s power delivery and the speakers’ sound reproduction – is fundamental for successful integration and avoiding compatibility problems.
Identifying Your MX-5 Trim Level (MK3/MK3.5)
Determining whether you have an MK3 (2006-2008) or MK3.5 (2009-2015) MX-5 is critical, as wiring and trim differences significantly impact installation. The MK3.5 generally presents a slightly more complex installation, notably requiring removal of the trim surrounding the gear stick and handbrake – a step unnecessary for the MK3. This difference stems from internal design changes implemented during the refresh.
Visual cues include the front bumper and headlight design; the MK3.5 features a more aggressive, streamlined appearance. Interior details, like the steering wheel and dashboard trim, also differ. Crucially, accessory compatibility, such as radio face plate adaptors, is trim-specific. Using an MK3.5 faceplate in an MK3 will result in a poor fit. Knowing your trim level ensures you purchase the correct wiring harnesses and adaptors, streamlining the process and preventing frustrating compatibility issues. Accurate identification is the first step towards a successful Bose system upgrade.
Wiring Harness Adapters: Connects2 and Alternatives
Utilizing a wiring harness adapter is essential for integrating an aftermarket head unit with the factory Bose system without cutting wires. Connects2 is a popular choice, offering ISO-compatible harnesses specifically designed for Mazda MX-5s. These adapters simplify connections, allowing plug-and-play compatibility with the head unit and Bose amplifier. However, compatibility isn’t universal; some head unit manufacturers, like Sony, may require an additional adapter to bridge the gap between the Connects2 ISO harness and the head unit’s proprietary connector.
Alternatives to Connects2 exist, often available through eBay or specialized car audio retailers. These alternatives frequently include provisions for steering wheel control retention, a valuable feature to maintain. When selecting an adapter, verify it supports your specific MX-5 trim level (MK3 or MK3;5) and head unit model. Some harnesses include a cable to lower the head unit’s amp output, preventing overpowering the Bose amplifier. Careful selection ensures a seamless and functional upgrade, preserving the Bose system’s sound quality.
Kenwood Head Unit Integration with Bose System
Integrating a Kenwood head unit into a Mazda MX-5 with the Bose system is achievable with the correct wiring harness adapter. A commonly recommended option, sourced from Amazon, facilitates a relatively straightforward installation. The Connects2 harness, paired with a Kenwood unit, allows direct connector compatibility, though some users report needing to separate the black connectors on the harness to utilize the amp output reduction cable. This cable is crucial for preventing the aftermarket head unit from overpowering the factory Bose amplifier.
Essential wiring tasks include connecting labelled wires for steering wheel remote control and parking sensor functionality. A particularly important step is splicing the blue/white amp remote wire from the Kenwood head unit to the solid blue wire on the adapter harness. This connection provides power to the Bose amplifier. Successful integration results in a fully functional system, retaining steering wheel controls and preserving the original Bose speaker setup, offering a balanced audio experience.

Sony Head Unit Integration Considerations
When opting for a Sony head unit in your MX-5 with the Bose system, additional adapters may be necessary beyond the standard Connects2 ISO harness. Unlike Kenwood, Sony units might require a secondary adapter to bridge the connection between the Connects2 harness and the Sony’s proprietary wiring. This adds a layer of complexity to the installation process, potentially increasing the time and effort involved.
Careful planning is crucial to ensure compatibility and functionality. While the core principles of retaining the Bose amplifier and speakers remain the same – utilizing the amp output reduction cable to prevent overpowering – the adapter requirements differ. The splicing of the blue/white amp remote wire to the blue wire on the harness still applies, providing power to the Bose amp. Thorough research into Sony-specific adapter options is vital before commencing the installation to avoid compatibility issues and ensure a seamless integration.
Crutchfield Kits: Pros and Cons
Crutchfield kits are often recommended for car audio installations, and the Bose MX-5 setup is no exception. A primary advantage is their comprehensive nature, typically including a vehicle-specific wiring harness, dash kit, and potentially even mounting hardware; This simplifies the process, reducing the need to source individual components and ensuring compatibility. However, the cost can be higher compared to piecing together a solution from eBay or other sources.
While generally well-regarded, Crutchfield kits aren’t without potential drawbacks. Some users report that the included instructions, while helpful, may not cover every nuance of the Bose system integration. The necessity of the amp output reduction cable to protect the Bose amplifier remains, and it may not always be included directly in the kit, requiring a separate purchase. Ultimately, the value proposition depends on your comfort level with car audio installation and your willingness to invest in a potentially more streamlined, albeit pricier, solution.
Steering Wheel Control Retention
Maintaining functionality of your MX-5’s steering wheel controls after a head unit upgrade is highly desirable. Fortunately, it’s achievable, but requires careful consideration of the wiring harness adapter you choose. Many adapters, like the Connects2 harness mentioned in user experiences, specifically include a patch or interface for steering wheel control retention. This eliminates the need for separate modules or complicated programming.
However, compatibility isn’t guaranteed across all head units. The Connects2 harness appears to integrate seamlessly with Kenwood units, but other manufacturers, such as Sony, might necessitate an additional adapter to bridge the connection. Proper wiring of the designated wires from the head unit to the harness is crucial. Successful integration allows you to control volume, track selection, and other functions without taking your hands off the wheel, enhancing safety and convenience. Thoroughly research compatibility before purchasing any components.
Parking Sensor Integration
Preserving the functionality of your Mazda MX-5’s parking sensors during a head unit replacement is a key consideration for many owners. Fortunately, retaining this feature is generally possible with the correct wiring harness adapter. As highlighted in recent installation accounts, the adapter will have designated wires specifically for parking sensor connection. These wires need to be carefully connected to the corresponding wires emerging from the back of the aftermarket head unit.
Proper connection ensures the parking sensors continue to operate as intended, providing audible alerts when approaching obstacles. Incorrect wiring can lead to the sensors malfunctioning or becoming completely disabled. It’s vital to consult the wiring diagrams for both the head unit and the adapter to identify the correct connections. User experiences confirm that this is typically a straightforward wiring task, but attention to detail is paramount for a successful outcome. Verify functionality post-installation.
Amp Remote Wire Connection (Blue/White to Blue)
A crucial step in integrating an aftermarket head unit with the Bose amplifier involves correctly connecting the amp remote wire. The factory Bose system utilizes a blue/white wire for this purpose, which needs to be connected to the solid blue wire on the aftermarket harness. This connection signals the Bose amplifier to power on and off in sync with the head unit.
Direct connection isn’t always possible; splicing is often required. Recent installations confirm that the blue/white wire from the vehicle’s harness must be carefully spliced to the blue wire originating from the adapter harness. This ensures the Bose amp receives the necessary power signal. Failure to make this connection will result in the Bose amplifier remaining inactive, leaving you without sound. Proper insulation of the splice is essential to prevent shorts. Double-check polarity and secure the connection before testing.
Lowering Head Unit Amp Output for Bose Compatibility
A key consideration when pairing an aftermarket head unit with the factory Bose system is managing the head unit’s amplifier output. The Bose amplifier is designed to work with a specific signal level; an overly powerful signal from the new head unit can overwhelm and potentially damage the Bose amp. Therefore, reducing the head unit’s pre-amp output is vital for compatibility.
Many wiring harness adapters, like the Connects2 ISO harness, include a cable specifically designed to lower the head unit’s amp output. This cable often requires physically separating the black connectors on the harness to utilize it. This attenuation ensures the signal sent to the Bose amplifier is within its operational range, preserving sound quality and preventing damage. Without this adjustment, distortion or a lack of audio control can occur. Carefully follow the adapter’s instructions for proper implementation of this crucial step.
AUX Integration Harnesses: Trim-Specific Options
Integrating an auxiliary input into your MX-5’s Bose system isn’t always a universal process; it often depends on your vehicle’s specific trim level. Certain trims feature XM radio integrated directly into the head unit, while others utilize a separate XM tuner module located elsewhere within the car. This distinction impacts the availability and compatibility of AUX integration harnesses.
If your MX-5 has a separate XM tuner, finding a compatible AUX harness is generally more straightforward. However, if XM is built into the head unit, the integration process can be more complex, potentially requiring a more specialized harness or adapter. Researching your exact trim level and its radio configuration is crucial before purchasing any integration components. Identifying whether you have a separate tuner or integrated XM will dictate the correct harness needed for a successful AUX input installation, ensuring optimal audio functionality.
XM Radio Integration: Separate Tuner vs. Built-In
Successfully integrating XM radio functionality after upgrading the head unit in your MX-5 hinges on understanding whether your original Bose system utilized a separate XM tuner or had it built directly into the factory radio. This distinction dramatically alters the integration approach and required components.
Vehicles equipped with a separate XM tuner typically allow for a more straightforward integration. The tuner can often be retained and connected to the new head unit via an appropriate adapter. However, if your MX-5’s XM radio was integrated into the original head unit, retaining XM functionality becomes more challenging. You may need to purchase a new, standalone XM tuner and associated wiring harness, adding complexity and cost to the installation. Determining your vehicle’s configuration is paramount before proceeding, ensuring compatibility and a functional XM radio experience post-upgrade.
Removing Trim Around Gear Stick/Handbrake (MK3.5 Specific)
For owners of the 2006-2015 Mazda MX-5 (Miata) MK3.5, accessing the wiring behind the factory radio necessitates removing the trim surrounding the gear stick and handbrake. This step isn’t required on earlier MK3 models, making the MK3.5 installation slightly more involved. Careful removal is crucial to avoid damaging the trim pieces or the surrounding console.
The process typically involves gently prying the trim panel upwards, starting from the rear edge near the handbrake. Utilize a plastic trim removal tool to prevent scratches. Be mindful of the clips securing the panel; apply even pressure to release them without breakage. Once the rear clips are free, carefully work your way forward, releasing the remaining clips. Disconnect any electrical connectors attached to the trim, such as those for the power window switches. With the trim removed, you’ll gain access to the necessary wiring for head unit integration and Bose amplifier connection.
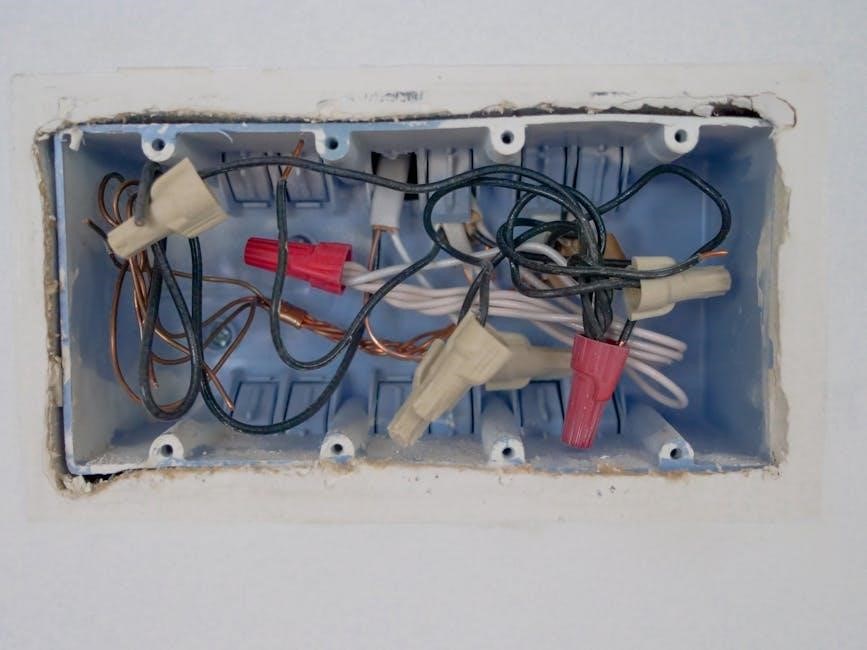
Wiring Color Codes and Identification
Successfully integrating an aftermarket head unit with the Bose system hinges on correctly identifying and connecting the wiring. The Connects2 harness, a popular choice for UK installations, provides labeled wires for common functions. However, understanding the Bose-specific connections is vital.
The aftermarket harness will feature standard ISO connectors. Key wires include red for 12V constant, yellow for 12V switched, black for ground, and orange for illumination. Steering wheel control wires are typically labeled, and require connection to the corresponding wires on the Connects2 patch lead. The crucial connection involves the blue/white (amp remote) wire from the head unit needing to be spliced into the solid blue wire on the Connects2 harness to activate the Bose amplifier.
Remember to lower the head unit’s amp output, often achieved by sawing off black connectors, to prevent overpowering the Bose amp; Careful attention to wire colors and functions ensures a seamless and functional installation.
Troubleshooting Common Wiring Issues
Post-installation, several issues can arise. A common problem is the Bose amplifier not powering on. This almost always points to an incorrect or failed connection of the blue/white (head unit amp remote) wire to the blue wire on the Connects2 harness. Double-check the splice for a secure connection and ensure the wire isn’t damaged.
If steering wheel controls aren’t functioning, verify the patch lead is correctly connected to both the head unit and the Connects2 harness. Incorrect wiring here is frequent. Parking sensor malfunctions often stem from a miswired parking sensor wire – consult the wiring diagrams to confirm correct connections.
Furthermore, if the sound is distorted, the head unit’s output may not be lowered sufficiently. Revisit the black connector modification to ensure the head unit’s amplifier isn’t overpowering the Bose system. Thoroughly review all connections and wiring diagrams to pinpoint the source of the issue.
Radio Face Plate Options for MK3/MK3.5 Dash
Integrating an aftermarket head unit necessitates a face plate to ensure a flush and aesthetically pleasing fit within the MX-5’s dashboard. These plates bridge the gap between the factory opening and the new head unit’s dimensions. For the MK3 (2006-2008) models, options are generally more straightforward, with readily available universal or MX-5 specific plates.
However, the MK3.5 (2009-2015) dash differs slightly, requiring a specific MK3.5 face plate. As noted, plates designed for the MK3 will not fit the MK3.5. MX5Parts.co.uk offers a dedicated MK3.5 face plate, ensuring a precise fit. Other retailers may also stock compatible options.
When selecting a face plate, consider the material and finish to match the interior. Ensure the plate fully supports the head unit’s mounting points and doesn’t interfere with ventilation or other dashboard functions. Proper installation of the face plate is crucial for a professional-looking result.
UK vs. US Wiring Differences
When tackling Bose system upgrades in the Mazda MX-5 (Miata), be acutely aware of wiring variations between UK and US models. Sourcing information and components requires careful consideration of your vehicle’s origin. The UK specification often utilizes different wiring harness connectors and potentially color coding compared to its US counterpart.
Specifically, wiring harness adapters like Connects2, while popular, may require slight modifications or the use of different adapters depending on whether the car is a UK or US model. The amp remote wire, for instance, often necessitates splicing the blue/white wire from the aftermarket head unit to the solid blue wire on the harness – a step that might differ based on regional wiring.
Furthermore, accessory integration, such as parking sensors, can present unique challenges. UK models may have different wiring configurations for these features. Always verify compatibility and consult region-specific wiring diagrams before making any connections to avoid damaging the system.
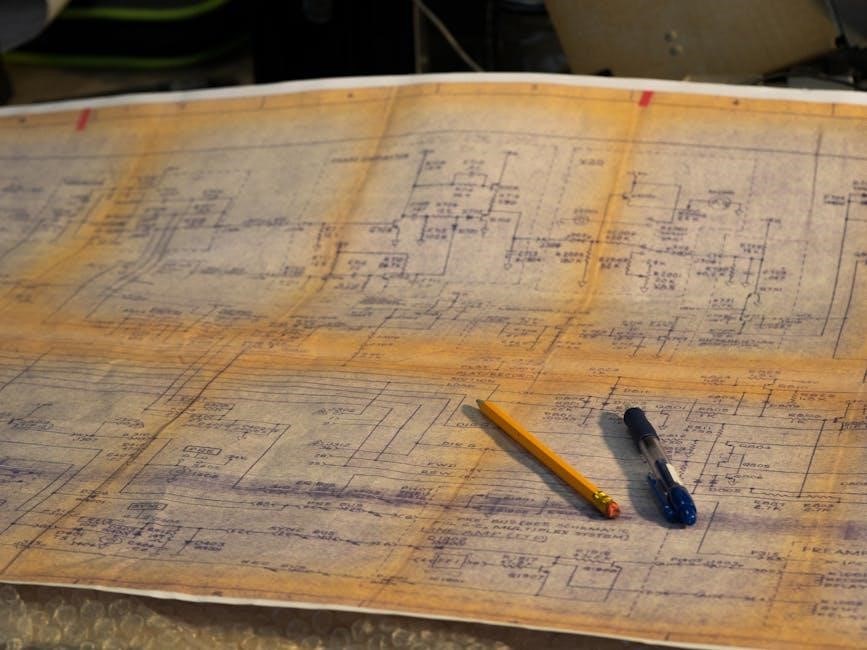
Resources for Wiring Diagrams and Information
Successfully navigating a Bose amp wiring upgrade demands access to reliable information. Online MX-5 forums, particularly those dedicated to the MK3 and MK3.5 generations, are invaluable resources. Members frequently share wiring diagrams, installation experiences, and troubleshooting tips specific to both UK and US models.
Websites like MX5parts.co.uk (mentioned in relation to radio faceplates) often host useful information and may offer technical support. Amazon and eBay listings for wiring harnesses sometimes include basic wiring schematics, though these should be verified against more comprehensive sources.
Additionally, the Connects2 website provides documentation for their wiring adapters, but it’s crucial to select the correct documentation for your specific vehicle year and region. Searching for “MX-5 MK3 Bose wiring diagram” will yield numerous results, but exercise caution and cross-reference information from multiple sources to ensure accuracy. Consider investing in a dedicated Mazda workshop manual for the most detailed diagrams.
Step-by-Step Installation Overview
Begin by safely disconnecting the vehicle’s battery. Remove the existing head unit, noting the trim removal process – MK3.5 models require gear stick/handbrake trim removal, unlike earlier MK3s. Connect the Connects2 (or equivalent) wiring harness to the vehicle’s wiring loom.
Next, connect the harness to the new head unit (Kenwood, Sony, etc.). If using a Kenwood, you may need to saw off black connectors to accommodate the amp output lowering cable. Splice the aftermarket harness’s blue wire to the Bose amp remote wire (blue/white).
Carefully connect steering wheel control and parking sensor wires, referencing the harness documentation. Install the radio faceplate, ensuring a secure fit. Reconnect the battery and test all functions: head unit, steering controls, parking sensors, and amplifier. Verify the amp is powered and audio is functioning correctly. Double-check all connections before fully reassembling the dashboard trim.
Post-Installation Testing and Verification
Following installation, a thorough testing phase is crucial. Power on the ignition and verify the new head unit illuminates and functions as expected. Cycle through all source options (FM, AM, USB, Bluetooth) to confirm audio output. Test the steering wheel controls – volume, track selection, and any other assigned functions – ensuring responsiveness.
Next, engage reverse to test the parking sensor integration. Listen for audible alerts and check the head unit display for visual cues. Confirm the Bose amplifier is receiving power and amplifying the signal correctly; listen for clear audio without distortion.
Finally, check for any unexpected behavior, such as persistent error messages or intermittent audio dropouts. If issues arise, double-check all wiring connections, particularly the amp remote wire splice. A systematic approach to testing will guarantee a successful and enjoyable upgrade.
Maintaining Your Bose System After Head Unit Upgrade
Post-upgrade, mindful operation extends the life of your Bose system. Avoid excessively high volume levels, as the factory amplifier, while compatible, isn’t designed for the output of some aftermarket head units – lowering the head unit’s amp output is key. Regularly check for any signs of distortion, which could indicate amplifier stress.
Periodically inspect the wiring connections, especially the spliced amp remote wire, to ensure a secure and clean connection. Consider using zip ties or other cable management solutions to prevent strain on the wires. Software updates for your new head unit can sometimes improve compatibility and performance.
Remember, the Bose speakers are tuned for a specific impedance. Replacing them could negatively impact sound quality and potentially damage the amplifier. Consistent, moderate use and preventative maintenance will ensure years of enjoyment from your upgraded audio system.